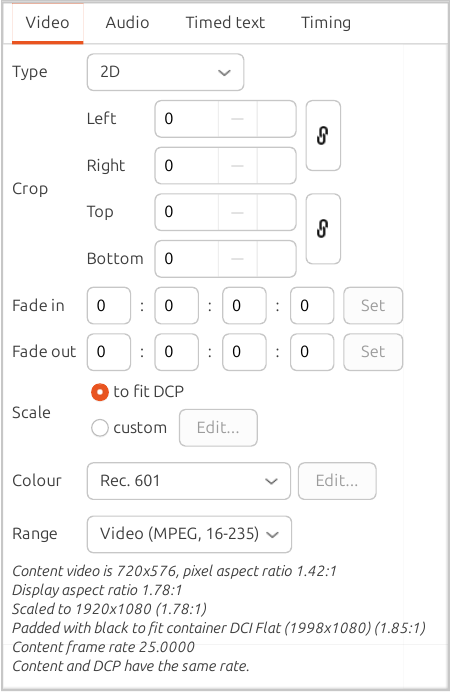
The Video tab controls properties of the image, as shown in Figure 6.1, “Video settings tab”.
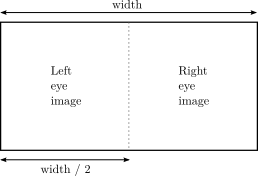
The next option on this tab is the ‘type’ of the video. This specifies how DCP-o-matic should interpret the video's image. 2D is the default; this just takes the video image as a standard 2D frame. The 3D left/right option tells DCP-o-matic to interpret the frame as a left-right pair, as shown in Figure 6.2, “3D left/right image type”.
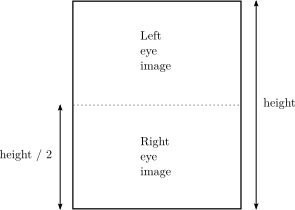
Alternatively the 3D top/bottom option tells DCP-o-matic to see the frame as a top-bottom pair, as shown in Figure 6.3, “3D top/bottom image type”.
Another option is 3D alternate which takes the first frame of the content as for the left eye, the second for the right eye, the third for the left, and so on. Finally, you can specify 3D left only or 3D right only if this content contains only the the left or right eye images. This is useful when you have the left and right eye image sets in different files; you can specify one content as 3D left only and another as 3D right only and DCP-o-matic will pick up the appropriate frames from each.
The Colour conversion setting specifies what colour transforms and gamma correction DCP-o-matic will use when converting the selected content into the XYZ colourspace for the DCP.
In particular, the setting you choose here should be the colour space that the content has been created or graded for. DCP-o-matic will take care of converting your content's colourspace into the correct one for the DCP.
The easiest way to select the required conversion is to choose one of DCP-o-matic's presets. DCP-o-matic knows how to convert from seven common colourspaces: sRGB, Rec. 601, Rec. 709, Rec. 1886, Rec. 2020, S-Gamut3 and P3. If you do not know which preset you should use, refer to the suggestions in Table 6.2, “Suggested colour conversion settings”.
Table 6.2. Suggested colour conversion settings
| sRGB | Still images in RGB, e.g. photographs. |
| Rec. 601 | Standard-definition content (fewer than about 1000 pixels across) including DVD rips. |
| Rec. 709 | High-definition content including Blu-Ray rips. |
| P3 | Content explicitly graded to P3. |
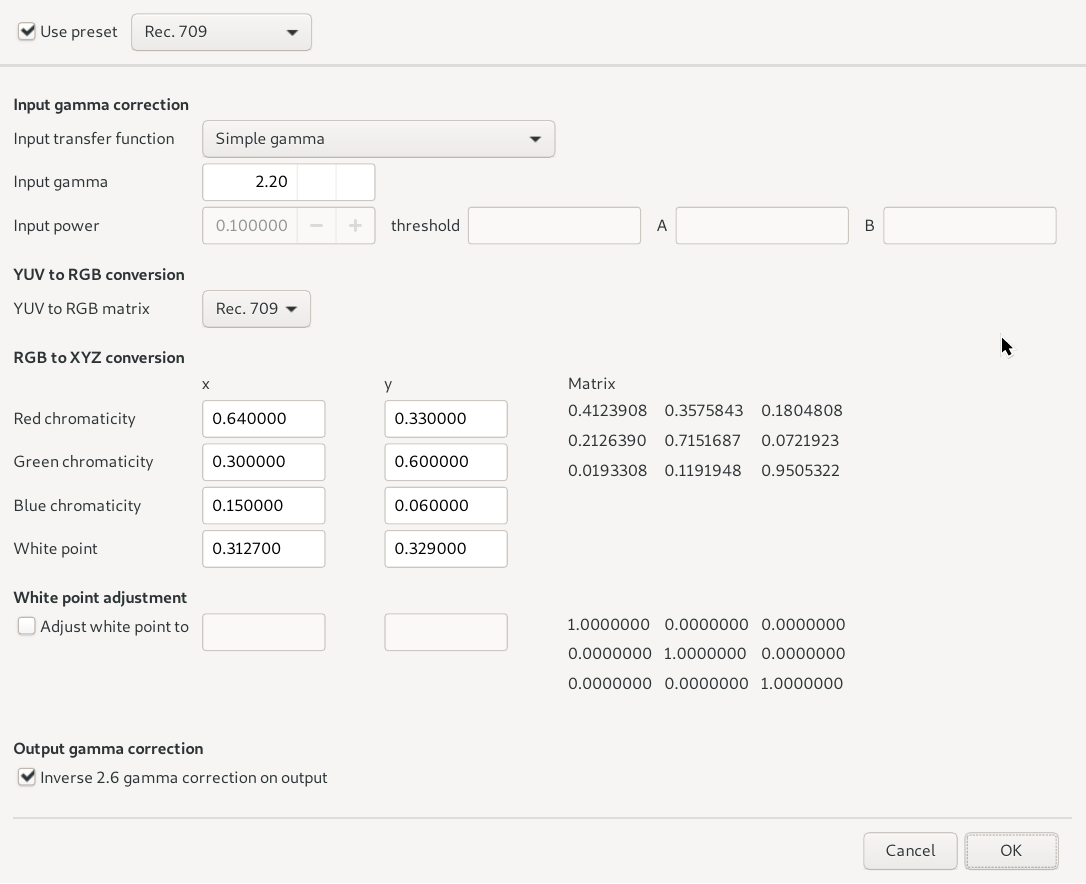
For other required colour conversions, and if you know what you are doing, you can choose Custom which will open the full colour conversion editing dialogue box:
Alternatively, choose None if your source files are already in the XYZ colour space and require no conversion.
DCP-o-matic's colour conversion processes are discussed in much more detail in a separate document colour.pdf.
The crop settings can be used to crop your content, which is often used to remove black borders from the edges of the image. The specified number of pixels will be trimmed from each edge, and the content image in the right of the window will be updated to show the effect of the crop.
The fade in and fade out settings can be used to apply linear fades into and out of a piece of content. Specify the time for each, clicking Set after making any changes.
The Scale option governs the shape that DCP-o-matic will scale the content's image into. In most cases to fit DCP will do the right thing; if not, choose custom and you can specify exactly how the image should be scaled.
At the bottom of the video tab is a short description of what will happen to your video with the current settings. In the example of Figure 6.1, “Video settings tab”, DCP-o-matic is telling you that the video file is 720x576 pixels and has rectangular pixels (a pixel aspect ratio of 1.42:1) and so its display aspect ratio is 1.78:1. Since the controls specify to fit DCP DCP-o-matic scales the image to 1918x1080 and pads it to the DCP's container ratio of 1.85:1 (called ‘DCI Flat’). For a 2K DCP this is 1998x1080 pixels.
This description also gives the frame rate of the content and what will happen to it when it is played at the DCP's frame rate. See Chapter 12, Frame rates for details of DCP-o-matic's frame-rate conversion.


