This section gives a little more detail about how DCP-o-matic process video as it takes it from a source and puts it into a DCP.
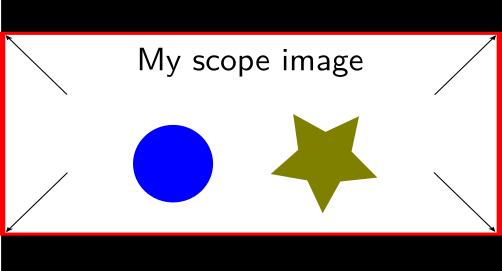
Consider, as a rather contrived example, that we have a 720 x 576 image which is letterboxed with 36 black pixels each at the top and bottom, and the video content within the letterbox should be presented in the DCP at ratio of 2.39:1 within a 1.85:1 frame (such as might happen with a trailer). The source image is shown in Figure 6.16, “Example image to demonstrate video processing”.
DCP-o-matic runs through the following steps when preparing an image for a DCP:
- Crop
- Scale
- Place in container
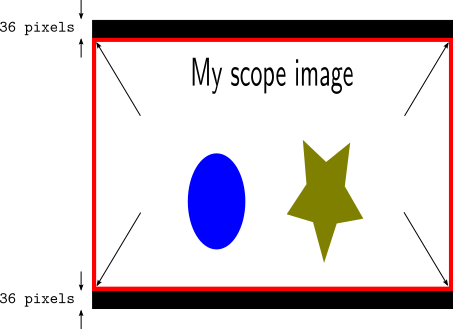
First, some amount of the image can be cropped. This is almost always used to remove black borders (letterboxing and/or pillarboxing) around images.
In our example image, we would use 36 pixels of crop from the top and bottom. This would give the new image shown in Figure 6.17, “Example image after cropping”.
The next step is to scale the image. Since this content should be presented in a 2.39:1 (scope) aspect ratio inside a 1.85:1 (flat) DCP we would select custom from the Scale option in the Video tab, then choose a ratio (Set ratio and fit to DCP container) of 2.39:1.
Next, we would choose Flat from the Container option in the DCP tab.
Given the scaling and container information, DCP-o-matic will look at the DCP's container size, and then scale the source image up until one or both of its dimensions (width, height or both) fits the size of the container, all the while preserving the desired aspect ratio.
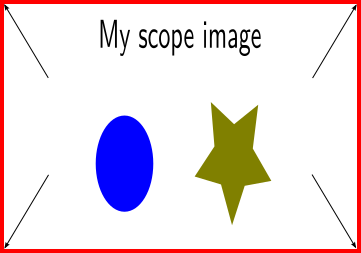
In our example here, the DCP's container is specified as 1.85:1 (so that the DCP will play back correctly using the projector's ‘Flat’ preset). At 2K, 1.85:1 is 1998 pixels by 1080. Scaling the source up whilst preserving its 1.85:1 aspect ratio will result in the image hitting the sides of the container first, at a size of 1998x836. This gives us a new version of the image as shown in Figure 6.18, “Example image after cropping and scaling”.

The final step is to place the image into the DCP. In this case, since we have a 2.39:1 image that should be presented as a 1.85:1 DCP, we have set the container in the DCP tab to be Scope. Since the content has been scaled to 1998 x 836, and a Flat container is 1998 x 1080, there will be some black bars at the top and bottom of the image. DCP-o-matic shares out this black equally, as shown in Figure 6.18, “Example image after cropping and scaling”.